
As a pet owner and gardening enthusiast, I’ve always believed that our outdoor spaces should be sanctuaries not just for us, but for our furry companions as well. Creating a pet-friendly garden isn’t just about aesthetics; it’s about crafting a safe, stimulating, and enjoyable environment where both you and your pets can thrive. In this comprehensive guide, I’ll share my experiences and insights on how to transform your garden into a veritable pet paradise.
Introduction: Why Your Garden Matters for Your Pet’s Well-being
When I first brought my rescue dog, Max, home, I quickly realized that my garden wasn’t just a place for my horticultural pursuits – it was now an essential part of Max’s world too. Our outdoor spaces play a crucial role in our pets’ physical and mental health. A well-designed pet-friendly garden can provide:
- Physical exercise: Ample space for running, playing, and exploring keeps our pets active and healthy.
- Mental stimulation: New sights, smells, and textures engage our pets’ senses and prevent boredom.
- Stress relief: Natural environments can have a calming effect on animals, just as they do on humans.
But how do we create a garden that caters to both our green thumbs and our pets’ needs? The key lies in thoughtful planning and design. By considering our pets’ natural behaviors and instincts, we can create an outdoor space that’s not only beautiful but also safe and engaging for our animal companions.
As we delve deeper into this topic, we’ll explore various aspects of pet-friendly gardening, from choosing the right plants to creating dedicated play areas. Whether you have a sprawling backyard or a cozy balcony garden, these tips will help you create a space where your pets can thrive outdoors.
Choosing the Right Plants: Safe and Non-toxic Options
One of the first challenges I faced when pet-proofing my garden was selecting pet-safe plants. Many common garden plants can be toxic if ingested by cats or dogs. As a responsible pet owner, it’s crucial to research and choose non-toxic options that are safe for your furry friends to be around.
Here are some pet-friendly plants that I’ve successfully grown in my garden:
- Sunflowers: These cheerful blooms are not only safe for pets but also provide a fun hideout for smaller animals.
- Marigolds: Known for their pest-repelling properties, marigolds are also non-toxic to cats and dogs.
- Snapdragons: These colorful flowers add visual interest without posing a threat to curious pets.
- Catnip: A favorite among felines, catnip can provide entertainment for cats while being safe for dogs too.
- Rosemary: This aromatic herb is safe for pets and can even have health benefits when consumed in small amounts.
On the flip side, it’s equally important to know which plants to avoid. Some common toxic plants include:
- Lilies: Extremely toxic to cats, even in small amounts.
- Azaleas and Rhododendrons: Can cause severe digestive issues in pets.
- Sago Palm: All parts of this plant are poisonous to pets.
When in doubt, I always consult the ASPCA’s toxic plants database before introducing new flora to my garden. It’s a valuable resource that every pet-owning gardener should bookmark.
Remember, even with non-toxic plants, it’s best to discourage excessive chewing or digging. I’ve found that providing alternative chew toys and designated digging areas can help redirect these natural behaviors away from your prized petunias.
By carefully selecting pet-safe plants, we can create a beautiful and safe garden that both we and our pets can enjoy without worry. In the next section, we’ll explore how to design pathways that keep our pets safe as they navigate through their outdoor paradise.
Creating Safe Pathways: Preventing Injuries and Mishaps
When I first watched Max navigate my garden, I realized that what seemed like a straightforward path to me could be a potential hazard for him. Creating safe pathways is essential in a pet-friendly garden, not just for aesthetics but for preventing injuries and ensuring easy navigation for our furry friends.
Here are some key considerations I’ve learned about creating pet-safe garden paths:
- Choose pet-friendly materials: Opt for materials that are gentle on paws and provide good traction. Some excellent options include:
- Smooth pebbles: These are easy on paws and provide drainage.
- Bark mulch: Soft and natural, but ensure it’s not treated with harmful chemicals.
- Flagstones: Flat and stable, they’re great for larger areas.
- Avoid sharp edges: Rounded corners and smooth transitions between different areas of the garden can prevent accidental scratches or injuries.
- Create wide paths: Wider paths allow pets to move freely without trampling plants. I aim for paths at least 3 feet wide for my medium-sized dog.
- Provide solid footing: Ensure paths are level and well-compacted to prevent tripping or sinking, especially important for older pets or those with mobility issues.
- Consider temperature: In hot climates, remember that paved surfaces can become too hot for sensitive paw pads. I’ve incorporated shaded paths and used light-colored materials that absorb less heat.
- Illuminate pathways: For evening garden strolls, low-level lighting along paths can help prevent accidents and make your garden safer for nighttime potty breaks.
One project that significantly improved my garden’s safety was creating a dedicated pet pathway. Here’s how I did it:
- I mapped out a route that Max frequently used, ensuring it avoided any potentially dangerous areas.
- I cleared the path and laid down a layer of landscape fabric to prevent weed growth.
- I edged the path with pet-safe, rounded stones.
- Finally, I filled the path with a mix of smooth pebbles and bark chips, creating a surface that’s comfortable for Max’s paws and visually appealing.
This pathway not only keeps Max safe but also helps protect my plants from being trampled. It’s a win-win solution that has made our garden more enjoyable for both of us.
Remember, the goal is to create paths that guide your pet through the garden safely while still allowing them the freedom to explore. By thoughtfully designing our garden’s layout, we can prevent many potential accidents and create a space where our pets can roam with confidence.
In the next section, we’ll explore how to create dedicated play areas that keep our pets entertained and exercised right in our own backyards.
Building a Pet Play Area: Fun and Exercise in the Garden
After ensuring safe navigation through the garden, my next focus was on creating a dedicated pet play area. This space serves as a hub for exercise, mental stimulation, and bonding with our furry friends. Here’s how I approached this exciting project:
- Choose the right location: I selected a spot that was visible from the house, partially shaded, and away from delicate plants. This allows for easy supervision and comfort for Max during playtime.
- Surface considerations: For the play area surface, I opted for a mix of artificial turf and rubber mulch. The turf is easy to clean and stays green year-round, while the rubber mulch provides a soft landing for active play. Both materials are durable and pet-friendly.
- Incorporate agility equipment: To keep Max engaged and active, I introduced some simple agility equipment:
- A tunnel made from a large drainage pipe
- Weave poles created from PVC pipes
- A small ramp for climbing practice
- Add interactive toys: I rotate a selection of weather-resistant toys in the play area to keep things interesting. Some favorites include:
- A treat-dispensing ball that encourages problem-solving
- A sturdy rope toy for tug-of-war games
- A durable frisbee for fetch
- Create shade and rest areas: I installed a shade sail over part of the play area and added a comfortable outdoor dog bed for rest breaks.
- Water station: A pet-friendly water fountain ensures Max stays hydrated during play sessions.
One of the most successful additions to our pet play area was a DIY obstacle course. Here’s how I created it:
- I used old tires, partially buried in the ground, to create a series of jumps.
- I constructed a simple balance beam using a sturdy plank of wood elevated on cinder blocks.
- I created a “pause table” using a large, flat stone where Max can practice his “stay” command.
This obstacle course not only provides physical exercise but also mental stimulation as Max learns to navigate the different elements. It’s been a great tool for training and bonding sessions.
Remember, the key to a successful pet play area is to cater to your pet’s specific needs and interests. For instance, if you have a cat, you might include:
- Climbing structures: Cats love vertical spaces, so consider adding cat trees or wall-mounted shelves.
- Hiding spots: Incorporate boxes or small enclosed spaces for your cat to explore and rest in.
- Scratching posts: These protect your garden furniture and provide necessary exercise for your cat’s claws.
By creating a dedicated play area, we’re not only providing a safe space for our pets to expend energy but also protecting the rest of our garden from potential damage caused by overzealous play. It’s a space where our pets can be themselves, and where we can join in the fun, strengthening our bond through play and exercise.
In the next section, we’ll explore how to incorporate water features that serve both as a play element and a necessary source of hydration for our pets.
Water Features for Pets: Hydration and Play Combined
Water is essential for our pets’ health and well-being, and incorporating pet-friendly water features in our gardens can serve the dual purpose of providing hydration and a source of entertainment. When I decided to add a water feature to my garden, I wanted something that would be both functional for Max and aesthetically pleasing for me. Here’s what I learned in the process:
- Safety first: The most important consideration is to ensure that any water feature is safe for your pet. This means:
- Avoiding deep pools that could pose a drowning risk
- Ensuring edges are not slippery
- Making sure the water is clean and free from harmful chemicals
- Shallow streams: I created a shallow, meandering stream in one corner of the garden. The gentle flow of water attracts Max, encouraging him to drink and play. The stream is only a few inches deep, making it safe for splashing without the risk of drowning.
- Pet fountains: There are many commercial pet fountains available, but I decided to create a DIY version. I used a small pump in a large, shallow basin to create a bubbling fountain. The sound of running water attracts Max and encourages him to drink more frequently.
- Sprinkler play: On hot days, I set up a sprinkler in the play area. Max loves running through the water, and it’s a great way to combine play and cooling off.
- Pebble fountain: In a quieter area of the garden, I installed a small pebble fountain. The water trickles over smooth stones, creating a calming sound and providing a drinking source for both Max and visiting wildlife.
- Maintenance: Regular cleaning is crucial to prevent the growth of algae or bacteria. I make sure to change the water frequently and clean the features thoroughly at least once a week.
One of my favorite additions has been a DIY dog splash pad. Here’s how I created it:
- I designated a small area (about 4×4 feet) in a sunny spot of the garden.
- I dug out the area to a depth of about 6 inches and filled it with gravel for drainage.
- I laid down a heavy-duty pond liner and secured it at the edges.
- I attached a hose to a sprinkler system designed for kids’ play areas, with multiple water jets.
- I surrounded the area with non-slip rubber tiles for safe entry and exit.
This splash pad has been a hit during summer months, providing a safe way for Max to cool off and play in the water. It’s also easy to drain and clean, ensuring the water stays fresh and hygienic.
For cat owners, consider a cat water fountain. Cats are often attracted to moving water, and a fountain can encourage them to drink more, which is especially important for their urinary health.

Remember, while water features can be great fun, always supervise your pets around water, especially if they’re not strong swimmers. By thoughtfully incorporating water into our garden designs, we can create spaces that are not only beautiful but also functional and fun for our furry friends.
In the next section, we’ll discuss how to secure our pet paradise with appropriate fencing and boundaries.
Fencing and Boundaries: Keeping Your Pet Secure
Creating a safe and secure environment for our pets is paramount, and proper fencing and boundaries play a crucial role in achieving this. When I first started pet-proofing my garden, I realized that my existing fence had several weak points that could potentially allow Max to escape or intruders to enter. Here’s what I’ve learned about creating effective barriers:
- Choose the right fence type: The ideal fence depends on your pet’s size, breed, and habits. For Max, a medium-sized dog with a tendency to jump, I opted for a 6-foot wooden fence. Consider these options:
- Wooden fences: Sturdy and private, but require maintenance
- Chain-link fences: Affordable and durable, but offer less privacy
- Vinyl fences: Low-maintenance and come in various styles
- Aluminum fences: Durable and rust-resistant
- Check for gaps and weak spots: Regularly inspect your fence for any holes, loose boards, or gaps that your pet could squeeze through. I make it a habit to walk the perimeter of my garden weekly.
- Secure the bottom: To prevent digging, I installed a chicken wire skirt along the bottom of the fence, burying it about 6 inches deep and extending it 12 inches outward.
- Consider visibility: If your dog is reactive to outside stimuli, a solid fence might be better than one they can see through. Alternatively, you can add privacy slats to a chain-link fence.
- Gates and latches: Ensure all gates have secure, pet-proof latches. I installed a two-step latch that Max can’t figure out, but is still easy for humans to operate.
- Create visual boundaries: Within the garden, I use low fences and borders to create distinct areas. This helps Max understand where he’s allowed to go and where the plant beds are off-limits.
- Use natural barriers: Dense shrubs or hedges can act as additional boundaries while adding to the garden’s aesthetics. Just ensure they’re not toxic to pets.
One project that significantly improved our garden’s security was installing a coyote roller system along the top of the fence. Here’s how I did it:
- I purchased aluminum rollers designed to fit on top of fences.
- I attached brackets to the fence posts at regular intervals.
- I installed the rollers onto the brackets, ensuring they spin freely.
- I tested the system to make sure it would prevent Max from getting a grip if he tried to climb over.
This system has been extremely effective in preventing Max from jumping the fence, and it does so without detracting from the garden’s appearance.
For cat owners, creating a secure outdoor space can be more challenging due to cats’ climbing abilities. Consider these options:
- Cat fencing add-ons: These attach to the top of existing fences at an inward angle, preventing cats from climbing out.
- Enclosed “catios”: These are fully enclosed outdoor spaces that allow cats to experience the outdoors safely.
Remember, while physical barriers are essential, they should be complemented by training. I’ve worked with Max to respect the garden boundaries, using positive reinforcement techniques to teach him where he’s allowed to go.
By creating secure boundaries, we can give our pets the freedom to enjoy the garden while ensuring their safety. This peace of mind allows both pet and owner to relax and fully enjoy the outdoor space we’ve created.
In the next section, we’ll explore how to provide essential shade to protect our pets from the sun’s harsh rays.
Shady Spots: Protecting Your Pet from the Sun
Just like humans, our pets need protection from the sun’s harmful rays. Creating shady spots in your garden is crucial for preventing heatstroke and ensuring your pet’s comfort during hot days. When I noticed Max seeking out cooler areas during our summer afternoons, I knew it was time to enhance our garden’s shade options. Here’s what I’ve learned about creating pet-friendly shady spots:
- Natural shade: Trees and large shrubs provide excellent natural shade. I planted a fast-growing shade tree (a Red Maple) in a strategic location where Max often likes to rest. Some other good options include:
- Dogwood: Provides dappled shade and beautiful flowers
- Weeping Willow: Creates a curtain-like canopy of shade
- Magnolia: Offers dense shade and fragrant blooms
- Artificial shade structures: For immediate shade solutions, consider:
- Pergolas: I built a simple pergola and trained climbing plants over it for additional coverage
- Shade sails: These are affordable, easy to install, and can be moved as needed
- Canopies or awnings: Great for extending shade from the house into the garden
- Cooling mats: I placed a gel-filled cooling mat under a shady spot for Max to lie on during particularly hot days. These mats stay cooler than the ambient temperature and provide relief for pets.
- Raised platforms: Elevated beds or platforms allow air to circulate underneath, keeping your pet cooler. I built a simple raised wooden platform in a shaded corner of the garden.
- Water features: Remember the splash pad we discussed earlier? I strategically placed it in a partially shaded area to combine cooling water play with sun protection.
- Portable shade: For flexibility, I keep a pop-up canopy on hand. This is great for providing shade in different areas of the garden or during outdoor events.
One DIY project that has been particularly successful in our garden is a pet-friendly shade garden. Here’s how I created it:
- I chose a naturally shaded area under a large tree.
- I cleared the area and laid down a path using pet-safe materials (as discussed in the pathways section).
- I planted shade-loving, pet-safe plants like Hostas, Ferns, and Impatiens.
- I added a comfortable outdoor pet bed and a water bowl.
- I installed some low-level solar lights for evening ambiance.
This shade garden has become Max’s favorite retreat on hot afternoons, and it’s a beautiful addition to our overall landscape.
For cats, consider creating elevated shady spots. Cats love to climb and observe from high places, so a cat tree or shelves placed in a shaded area can be ideal. Ensure these structures are stable and won’t topple if your cat leaps onto them.
Remember, even with ample shade, it’s important to monitor your pet for signs of overheating, especially on very hot days. Always ensure fresh water is available and limit outdoor time during the hottest parts of the day.
By thoughtfully incorporating shaded areas into our gardens, we can create cool, comfortable spaces for our pets to relax and play, even on the warmest days.
In our next section, we’ll explore how to keep our gardens pest-free using methods that are safe for our furry friends.
Pet-Safe Pest Control: Keeping the Garden Pest-Free Naturally
As a pet owner and gardener, I’ve always been concerned about using traditional pesticides in my garden. Many common pest control products can be harmful or even fatal to our furry friends. Over the years, I’ve discovered numerous pet-safe alternatives that effectively keep pests at bay without putting Max at risk. Here’s what I’ve learned about natural, pet-friendly pest control:
- Companion planting: This method involves planting certain species together to deter pests naturally. Some effective combinations I’ve used include:
- Marigolds to repel aphids and nematodes
- Nasturtiums to draw aphids away from other plants
- Lavender to deter fleas and moths
- Diatomaceous earth: This natural powder is harmless to mammals but deters many crawling insects. I sprinkle it around the base of plants prone to pest attacks.
- Neem oil: This organic compound is an effective pesticide and fungicide. I dilute it according to package instructions and spray it on affected plants, being careful to avoid areas where Max might directly contact the treated foliage.
- Beneficial insects: Introducing ladybugs or praying mantises to your garden can help control pest populations naturally. I purchase these from local garden centers and release them in the evening when they’re less likely to fly away.
- Homemade sprays: I’ve had success with a simple garlic and chili spray. Here’s my recipe:
- Blend 2 hot peppers and 1 whole garlic bulb
- Steep in 2 cups of hot water for 24 hours
- Strain and add to a spray bottle with 1 quart of water
- Spray on plant foliage to deter pests
- Physical barriers: For larger pests like rabbits or deer, I use wire mesh or row covers to protect vulnerable plants.
- Encourage natural predators: I’ve installed birdhouses and bat boxes to attract these natural pest controllers to my garden.
One of my most successful pet-safe pest control projects has been creating a herb barrier. Here’s how I did it:
- I identified the areas of the garden most prone to pest invasions.
- I planted a border of strongly-scented herbs around these areas, including:
- Rosemary
- Mint (in containers to prevent spreading)
- Basil
- Lemongrass
- I maintain these herbs by regular pruning, which releases their pest-deterring scents.
This herb barrier not only helps control pests but also provides fresh herbs for cooking and creates a fragrant garden experience for both Max and me.
For cat owners, be cautious with essential oils and certain herbs, as some can be toxic to cats. Always research pet safety before introducing new plants or pest control methods.
Remember, the goal of pet-safe pest control is to manage pest populations, not necessarily eliminate them entirely. A few insects can actually be beneficial for your garden’s ecosystem. By using these natural methods, we can maintain a healthy balance in our gardens while ensuring our pets’ safety.
In our next section, we’ll explore the essential garden tools that make maintaining a pet-friendly garden easier and safer.
Essential Garden Tools: Making Maintenance Easy and Safe
Maintaining a pet-friendly garden requires the right tools – ones that are not only effective for gardening tasks but also safe to use around our furry friends. Over the years, I’ve curated a set of essential garden tools that help me keep our outdoor space beautiful and safe for Max. Here’s my list of must-have items:
- Pet-safe lawn mower: I invested in a robotic lawn mower that operates on a schedule, keeping the grass at a consistent, pet-friendly height. It’s quiet, doesn’t use harmful chemicals, and Max has learned to coexist with it peacefully.
- Long-handled tools: To avoid bending over constantly (which can lead to back strain), I use long-handled versions of:
- Rake
- Hoe
- Pruning shears These tools also help me maintain a safe distance when working near thorny plants.
- Hand tools with ergonomic grips: For closer work, I use hand tools with comfortable grips to reduce fatigue. My essentials include:
- Hand trowel
- Cultivator
- Pruning scissors
- Pet waste scooper: A long-handled scooper with a bin attachment makes cleaning up after Max quick and hygienic.
- Garden hose with adjustable nozzle: This is crucial for watering plants and cleaning up. I chose a pet-safe, lead-free hose to ensure the water is safe if Max decides to drink from it.
- Leaf blower/vacuum: This tool helps me quickly clean up leaves and debris, reducing the risk of Max ingesting something harmful.
- Compost bin: I use a secure, animal-proof compost bin to dispose of garden waste safely. This prevents Max from getting into potentially harmful decomposing matter.
- Garden cart or wheelbarrow: This makes transporting plants, mulch, and tools much easier, reducing the likelihood of spills that could be harmful to pets.
- Pet-safe garden sprayer: For applying natural pest control solutions or fertilizers, I use a dedicated sprayer that’s never been used for harmful chemicals.
- Protective gear: While not strictly a tool, I always wear gloves, sturdy shoes, and protective eyewear when gardening to set a good example for safe practices around Max.
One DIY tool that has been particularly useful in our pet-friendly garden is a homemade paw-cleaning station. Here’s how I created it:
- I repurposed a shallow plastic storage container with a lid.
- I drilled small drainage holes in the bottom of the container.
- I filled the container with a layer of pebbles, then topped it with a soft microfiber mat.
- I keep this by the garden entrance with a small towel nearby.
Before Max comes inside, I dip his paws in the water-filled container and then dry them with the towel. This simple tool helps keep both the house and Max clean after our garden adventures.
For cat owners, consider investing in a good brush for removing plant matter or burrs from your cat’s fur after outdoor exploration.
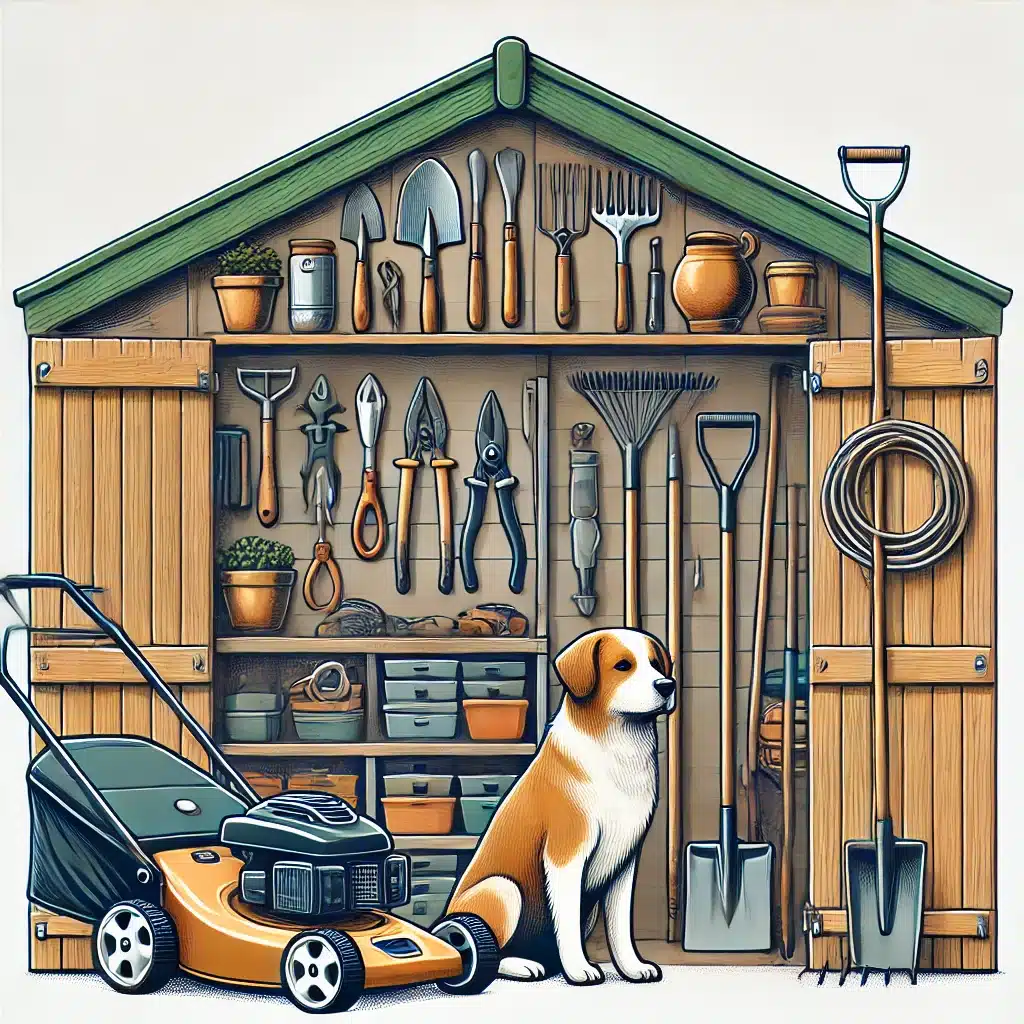
Remember, proper tool storage is crucial in a pet-friendly garden. I keep all tools in a secure shed or garage, well out of Max’s reach. This prevents any accidents with sharp or heavy objects.
By using the right tools and storing them properly, we can make garden maintenance safer and more efficient, leaving more time to enjoy our outdoor spaces with our pets.
Maintaining a pet-friendly garden can be a breeze with the right tools. For those who might not own all the necessary equipment, renting from a service like Mammoth Hire can be a cost-effective solution. They provide a variety of garden tools, ensuring you have everything you need to keep your garden safe and beautiful for your pets.
In our next section, we’ll explore some fun DIY projects that can enhance your pet-friendly garden experience.
DIY Projects for a Pet-Friendly Garden
One of the most rewarding aspects of creating a pet-friendly garden has been the opportunity to undertake DIY projects that cater specifically to Max’s needs and preferences. These projects not only enhance the functionality of our garden but also provide a sense of accomplishment and strengthen the bond between pet and owner. Here are some of my favorite DIY projects that have made our garden more pet-friendly:
- Outdoor Pet Bed: I created a weather-resistant pet bed using the following steps:
- Repurposed an old wooden pallet
- Sanded it smooth and painted it with pet-safe, weather-resistant paint
- Added casters for mobility
- Fitted it with a waterproof dog bed for comfort
- Sensory Garden: This project engages Max’s senses:
- Planted pet-safe herbs like mint, rosemary, and thyme for interesting scents
- Created textured paths using materials like smooth pebbles, bark chips, and sand
- Installed wind chimes for auditory stimulation
- Added pet-safe ornamental grasses that move in the breeze, providing visual interest
- Doggy Digging Box: To satisfy Max’s natural digging instinct without damaging the garden:
- Built a wooden frame, about 4×4 feet
- Lined it with landscape fabric to prevent weeds
- Filled it with a mix of sand and soil
- Buried some of Max’s favorite toys for him to “discover”
- Pet-Friendly Water Fountain: This provides fresh, moving water:
- Used a large, shallow ceramic pot as a base
- Installed a small submersible pump
- Added rocks of various sizes for interest and to create different water sounds
- Ensured all edges are smooth and safe for curious paws
- Agility Course: I created a simple agility course using mostly upcycled materials:
- Made weave poles from PVC pipes painted in bright colors
- Created jumps using old tires, partially buried in the ground
- Built a seesaw using a sturdy plank and a central support
- Used an old barrel as a tunnel
- Paw-Print Stepping Stones: This project adds a personal touch to the garden:
- Mixed concrete in a large bucket
- Poured it into circular molds
- Let Max make a paw print in each stone before it set
- Placed these stepping stones along our main garden path
- Outdoor Toy Storage: To keep the garden tidy:
- Repurposed an old wooden crate
- Added a hinged lid for weather protection
- Painted it with pet-safe, weather-resistant paint
- Attached it to our fence at Max’s height for easy access
- Cool-Down Misting Station: Perfect for hot summer days:
- Installed a misting system along our fence
- Connected it to our garden hose via a timer
- Created a shaded area underneath with a canopy
- Pet-Safe Plant Markers: To help identify safe and unsafe plants:
- Used wooden craft sticks
- Painted them with pet-safe paint
- Wrote plant names and whether they’re pet-safe
- Placed them in relevant plant beds
One of my favorite projects has been creating a Dog’s-Eye View Periscope. Here’s how I made it:
- I used PVC pipes to create a periscope structure.
- I installed small mirrors at 45-degree angles at the top and bottom of the pipe.
- I mounted the structure at Max’s eye level on a sturdy post near our fence.
- I made sure all edges were smooth and safe.
This periscope allows Max to safely see what’s happening on the other side of our fence, satisfying his curiosity without the risk of him jumping over.
For cat owners, consider creating a DIY Catio:
- Use sturdy wood to build a frame
- Enclose it with wire mesh for safety
- Add different levels, scratching posts, and cozy beds
- Ensure there’s a secure door connecting it to your house
Remember, safety should always be the priority in any DIY project. Ensure all materials are pet-safe, edges are smooth, and structures are stable. Always supervise your pet when introducing them to new garden features.
These DIY projects not only make our gardens more fun and functional for our pets but also allow us to personalize our outdoor spaces. They’re a great way to spend quality time working on something that will benefit both you and your furry friend.
In our next section, we’ll discuss how to create a designated digging zone to satisfy your pet’s natural instincts while protecting your garden beds.
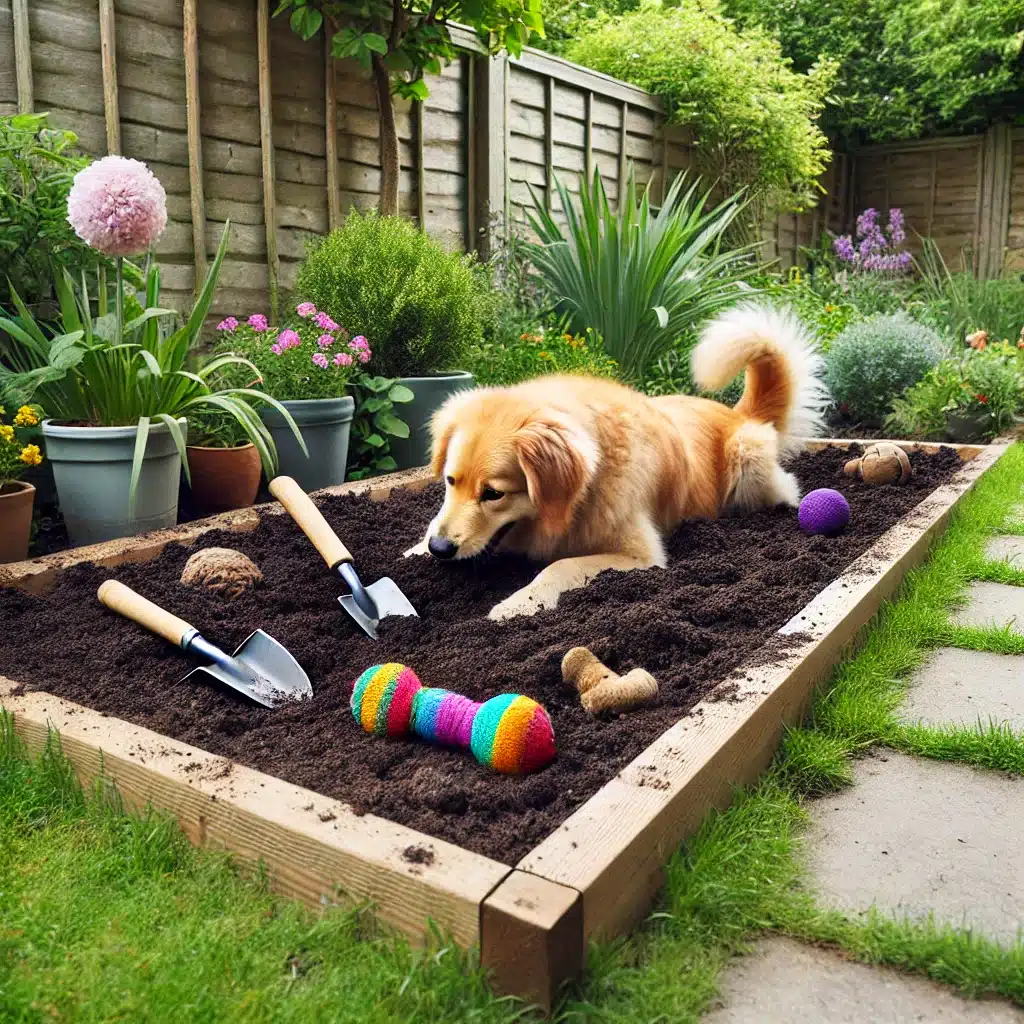
Creating a Digging Zone: Satisfying Your Pet’s Instincts
When I first caught Max enthusiastically digging up my prized rose bushes, I realized I needed to find a way to channel his natural digging instinct without sacrificing my garden. That’s when I decided to create a designated digging zone. This area has become a win-win solution, allowing Max to indulge in his instinctual behavior while preserving the rest of the garden. Here’s what I’ve learned about creating an effective digging zone:
- Choose the right location: I selected a spot that was:
- Partially shaded to keep the area cool
- Away from plant beds to avoid confusion
- Visible from the house for easy supervision
- Size matters: The digging zone should be large enough for your pet to move around comfortably. For Max, a medium-sized dog, I made an area about 4×4 feet.
- Proper materials: I used a combination of:
- Sand: For easy digging and paw-cleaning
- Soil: To mimic natural ground
- Pea gravel: For textural variety
- Border the area: To clearly define the digging zone, I used:
- Wooden planks: Creates a clear boundary
- Large, smooth stones: Adds a natural look
- Make it interesting: To encourage Max to use the zone, I:
- Buried some of his favorite toys
- Occasionally hid treats for him to find
- Added some sturdy digging toys designed for outdoor use
- Keep it clean: Regular maintenance is key:
- I scoop out any waste daily
- I rake the area weekly to keep it loose and inviting
- I replace the soil/sand mix every few months
One DIY project that really enhanced our digging zone was creating a “Treasure Island”. Here’s how I did it:
- I divided the digging zone into sections using small, buried pieces of wood.
- In each section, I buried different pet-safe items for Max to discover:
- Tennis balls
- Rope toys
- Hollow bones (which I sometimes fill with treats)
- I made a simple map of the “island” and marked it with an “X” where I buried a special treat.
- I showed Max the map (more for my amusement than his understanding!) before letting him loose in the digging zone.
This game adds an extra layer of fun and mental stimulation to Max’s digging activities.
For cats, while they generally don’t dig as much as dogs, you can create a similar zone using fine, clean sand. Many cats enjoy digging and burying in sand, especially if it’s placed in a quiet, private area of the garden.
Remember, creating a digging zone is only half the battle. You’ll also need to train your pet to use it:
- When you catch your pet digging in an inappropriate area, interrupt them gently and immediately guide them to the digging zone.
- Praise and reward them lavishly when they dig in the designated area.
- Make the digging zone more appealing than other areas by regularly adding new and interesting items.
- Be patient and consistent. It may take time, but most pets will learn to use their special digging area.
By providing a dedicated space for digging, we can satisfy our pets’ natural instincts while protecting our carefully cultivated gardens. It’s another way we can create harmony between our love for gardening and our love for our pets.
In our next section, we’ll explore safe options for mulch and ground cover in a pet-friendly garden.
Using Mulch and Ground Cover: Safe Options for Pets
Mulch and ground cover play crucial roles in gardening, helping to retain moisture, suppress weeds, and add aesthetic appeal. However, as pet owners, we need to be extra cautious about the materials we use. Some common mulches can be harmful if ingested or can harbor pests that might affect our pets’ health. Through trial and error, I’ve found several pet-safe options that work well in our garden. Here’s what I’ve learned:
- Coconut husk mulch (coir): This has become my go-to choice because:
- It’s non-toxic to pets
- It’s sustainable and eco-friendly
- It retains moisture well
- Its rough texture discourages pets from lying on plant beds
- Pine needle mulch: Another excellent option:
- Naturally repels insects
- Decomposes slowly, adding nutrients to the soil
- Its scent can deter some pets from digging
- Rubber mulch: Made from recycled tires, this is durable and safe:
- Non-toxic and non-abrasive
- Doesn’t attract pests
- Comes in various colors to complement your garden design
- Stone or river rock: While not traditional mulch, these make great ground covers:
- Too large for pets to swallow
- Allows for good drainage
- Provides a cooling surface for pets to rest on
- Living ground covers: These plants act as natural, pet-safe mulch:
- Creeping Thyme: Releases a pleasant scent when stepped on
- Irish Moss: Creates a soft, carpet-like surface
- Sedum: Drought-resistant and comes in various colors
- Cedar mulch: Use with caution:
- While the smell can repel fleas and other insects, some pets may be sensitive to its oils
- Ensure it’s not treated with any harmful chemicals
Mulches to avoid:
- Cocoa bean mulch: Toxic to dogs if ingested
- Treated wood chips: May contain harmful chemicals
- Mushroom mulch: Can contain fungi harmful to pets
One DIY project that has worked well in our garden is creating personalized pet-safe mulch bags. Here’s how:
- I purchased breathable, biodegradable bags.
- I filled each bag with a mix of pet-safe mulch materials (coconut coir, pine needles, and a small amount of compost).
- I added a few drops of pet-safe essential oils (like lavender or citronella) to some bags for insect-repelling properties.
- I labeled each bag with its contents and placed them around plants that Max showed too much interest in.
These mulch bags are easy to place and remove, allow for customization in different areas of the garden, and break down naturally over time.
For areas where Max frequently walks or plays, I’ve created mulch-free zones using:
- Clover: A hardy, low-growing plant that can withstand foot traffic
- Synthetic turf: A low-maintenance option that’s easy to clean
- Smooth pebbles: Create attractive pathways that are gentle on paws
Remember, even with pet-safe options, it’s important to supervise your pets, especially when introducing new materials to the garden. Some pets may try to eat mulch out of curiosity or boredom.
By choosing the right mulch and ground cover, we can maintain a beautiful, low-maintenance garden that’s also safe for our furry friends. It’s all part of creating an outdoor space that balances our gardening goals with our pets’ well-being.
In our next section, we’ll explore tips for gardening alongside our pets, turning potentially challenging moments into bonding experiences.
Gardening with Pets: Tips for Working Together
Gardening with a pet by your side can be a joyful experience, but it also comes with its own set of challenges. Over the years, Max and I have developed a harmonious gardening routine that allows us to enjoy our outdoor time together. Here are some tips I’ve learned for successfully gardening with pets:
- Establish boundaries:
- Use low fences or borders to clearly define areas where your pet can and can’t go
- Consistently reinforce these boundaries with positive reinforcement training
- Create a pet-friendly work zone:
- Set up a comfortable spot nearby where your pet can relax while you work
- Include water, shade, and perhaps a favorite toy
- Involve your pet:
- Give them “jobs” to do, like carrying a small, lightweight tool bag
- Let them “help” with digging in appropriate areas
- Use pet-safe tools and products:
- Opt for hand tools when your pet is nearby to avoid accidents with larger equipment
- Choose organic, pet-safe fertilizers and pest control methods
- Time your activities:
- Garden during cooler parts of the day to prevent your pet from overheating
- Take frequent breaks to give your pet attention and prevent boredom
- Be mindful of plants:
- Keep toxic plants out of reach or better yet, remove them from your garden
- Teach your pet a “leave it” command for plants they shouldn’t touch
- Provide alternatives:
- If your pet likes to dig, provide a designated digging area nearby
- If they enjoy chewing plants, offer pet-safe chew toys as an alternative
- Clean up promptly:
- Remove any plant debris, especially if you’ve been pruning toxic plants
- Store all tools and materials securely after use
- Stay alert:
- Always know where your pet is while you’re working
- Watch for signs of fatigue, overheating, or distress in your pet
- Make it fun:
- Incorporate play breaks into your gardening routine
- Reward your pet for good behavior in the garden
One activity that has worked well for Max and me is our “Garden Patrol” routine:
- Before I start gardening, Max and I walk the perimeter of our garden together.
- I use this time to inspect the fence for any breaches and check plants for signs of pests or disease.
- Max gets to sniff around and “patrol” his territory.
- I praise him for walking nicely beside me and not interfering with the plants.
- At the end of our patrol, he gets a treat and settles into his garden bed while I work.
This routine helps Max feel involved and sets a calm tone for our gardening session.
For cat owners, consider creating a “Catio Garden”:
- Set up a secure, enclosed space with cat-safe plants
- Include vertical spaces for climbing and observation
- Add a shallow water feature for drinking and play
Remember, patience is key when gardening with pets. It may take time for your furry friend to learn garden etiquette, but with consistency and positive reinforcement, most pets can become excellent gardening companions.
By involving our pets in our gardening activities, we not only keep them safe and entertained but also create opportunities for bonding and shared enjoyment of our outdoor spaces.
In our next section, we’ll discuss how to maintain a clean and hygienic garden environment for both pets and humans.
Maintaining a Clean Garden: Hygiene Tips for Pet Owners
Keeping a garden clean and hygienic is crucial when you share the space with pets. Not only does it make the garden more enjoyable for everyone, but it also helps prevent the spread of diseases and parasites. Over the years, I’ve developed a routine for maintaining a clean, pet-friendly garden. Here are some tips and practices I’ve found effective:
- Regular waste removal:
- Pick up pet waste daily: I use biodegradable bags for this task.
- Designate a specific area for pet relief to contain the mess.
- Consider a pet waste composter for eco-friendly disposal.
- Cleaning garden furniture:
- Wipe down surfaces regularly with pet-safe disinfectants.
- Use washable cushion covers on outdoor furniture.
- Brush off pet hair from furniture before it accumulates.
- Maintain water features:
- Change water in pet bowls daily to prevent algae growth and mosquito breeding.
- Clean and refill bird baths and fountains regularly.
- Use pet-safe algaecides in larger water features if necessary.
- Plant bed hygiene:
- Remove fallen leaves and debris regularly to discourage pests.
- Prune dead or diseased plant material promptly.
- Use organic mulch to suppress weeds and retain moisture.
- Pest control:
- Regularly inspect plants for signs of pests or diseases.
- Use pet-safe, natural pest control methods like neem oil or diatomaceous earth.
- Encourage natural predators like ladybugs and praying mantises.
- Tool and equipment care:
- Clean and disinfect gardening tools after each use.
- Store tools in a secure, pet-free area to prevent accidents.
- Regularly maintain larger equipment like lawnmowers to ensure they’re operating cleanly and efficiently.
- Paw cleaning station:
- Set up a paw-cleaning area near the entrance to your home.
- Use pet-safe wipes or a shallow water basin for quick clean-ups.
- Keep towels handy for drying.
- Regular health checks:
- Check your pet for ticks after each garden session, especially in wooded areas.
- Brush your pet regularly to remove any plant material or garden debris from their coat.
- Keep your pet’s vaccinations up to date, particularly for outdoor-related diseases.
- Composting safely:
- Use a secure, animal-proof compost bin to prevent pets from accessing potentially harmful decomposing matter.
- Avoid composting pet waste or diseased plants.
- Turn your compost regularly to speed decomposition and discourage pests.
- Seasonal clean-ups:
- Conduct a thorough clean-up in spring and fall to remove accumulated debris.
- Check and repair fences and structures to ensure they’re secure and free from splinters or sharp edges.
- Refresh mulch and ground covers as needed.
- Natural cleaning methods:
- Use a vinegar and water solution for cleaning hard surfaces like patios and decks.
- Sprinkle baking soda on grassy areas your pet frequents to neutralize odors before watering.
- Plant odor-absorbing plants like lavender or rosemary near high-traffic pet areas.
One DIY project that has significantly improved our garden hygiene is our “Garden Clean-Up Station”. Here’s how I created it:
- I repurposed an old potting bench, placing it near our garden entrance.
- I added hooks for hanging:
- Clean towels
- Waste bags
- A small brush for removing debris from fur
- I installed a small sink with a hand pump, connected to a rainwater barrel for easy paw-washing.
- I created a storage area underneath for:
- Pet-safe cleaning supplies
- First aid kit
- Extra leashes and collars
This station has made it much easier to keep both Max and our garden clean, and it serves as a reminder to perform quick clean-ups before entering the house.
For cat owners, consider these additional tips:
- Provide a covered litter area in a quiet part of the garden for outdoor cats.
- Use plant-based, biodegradable litter that’s safe for the garden ecosystem.
- Regularly clean and disinfect any outdoor cat furniture or scratching posts.
Remember, maintaining a clean garden is an ongoing process. By incorporating these practices into your regular garden routine, you can create a healthier, more hygienic environment for both you and your pets to enjoy.
A clean garden not only looks better but also promotes the health and wellbeing of all its inhabitants – human, animal, and plant alike. It’s another way we can show our love and care for our pets and our shared outdoor spaces.
In our final section, we’ll wrap up with some concluding thoughts on enjoying your pet-friendly garden.
Conclusion: Enjoying Your Pet-Friendly Garden
As we come to the end of our journey through creating and maintaining a pet-friendly garden, I’m reminded of the joy and fulfillment this process has brought to both Max and me. Transforming our outdoor space into a safe haven for pets while maintaining its beauty and functionality as a garden has been a rewarding experience, full of learning and bonding opportunities.
Let’s recap some of the key points we’ve covered:
- We learned the importance of choosing pet-safe plants and creating designated areas for different activities.
- We explored how to create safe pathways and secure boundaries to keep our pets protected.
- We discussed the creation of engaging play areas and water features that cater to our pets’ natural instincts and needs.
- We delved into pet-safe pest control methods and the use of appropriate garden tools.
- We looked at DIY projects that can enhance the pet-friendly aspects of our gardens.
- We covered the importance of creating shade and digging zones to satisfy our pets’ needs.
- We explored safe mulching options and how to garden alongside our pets.
- Finally, we discussed maintaining cleanliness and hygiene in our pet-friendly gardens.
Remember, creating a pet-friendly garden is not a one-time task, but an ongoing process of observation, adaptation, and care. As you spend time in your garden with your pet, you’ll likely discover new ways to make the space more enjoyable and safer for them.
Here are some final thoughts to keep in mind:
- Observe your pet’s behavior in the garden. They’ll often show you what they need or enjoy most.
- Be patient. It may take time for your pet to learn garden etiquette, but consistent positive reinforcement will pay off.
- Stay flexible. Be willing to make changes to your garden design if something isn’t working for you or your pet.
- Prioritize safety, but don’t forget about fun. A good pet-friendly garden balances both.
- Enjoy the process. Gardening with your pet can be a wonderful bonding experience and a source of shared joy.
One of the most rewarding aspects of creating a pet-friendly garden has been watching Max’s confidence and contentment grow in our outdoor space. From his excited “zoomies” through the pet-safe pathways to his peaceful naps in the shade garden, every moment reinforces the value of the effort we’ve put into making our garden pet-friendly.
For me, our garden has become more than just a beautiful outdoor space – it’s a living, growing testament to the love and care we have for our pets. It’s a place where Max can safely indulge his natural instincts, where we can play and relax together, and where we continue to create lasting memories.
I hope this guide has inspired you to look at your garden through your pet’s eyes and to create a space that you can both thoroughly enjoy. Remember, every garden and every pet is unique, so feel free to adapt these ideas to suit your specific needs and preferences.
Here’s to many happy hours spent with your furry friends in your very own pet paradise!

